VPN Configuraion
Table of Contents
Opuntia VPN
Opuntia supports a wide variety of VPN technologies. The main options for Opuntia are the following Vpn types.
- Wireguard
- OpenVpn
- IPsec
- IPsec/L2TP
We will detail each option in a section of this chapter of the Opuntia manual.
Wireguard
WireGuard is a simple and fast modern VPN solution that uses state of the art cyptography. It’s designed to be replace IPsec VPN’s while simpler to configure. And it is also more performant than OpenVpn. The offical WireGuard site lists the following as the major advantages of WireGuard.
- Simple & Easy to use
- Cryptographically Sound
- Minimal Attack Surface
- High Performance
WireGuard is also very tolerent of network changes. For example if a client device is connected to a Opuntia system using WireGuard and the client devices Public Ip Address changes due to roaming to a new network; the WireGuard vpn tunnel can be reestablished in just miliseconds. This allows for seemless operation in changing network conditions.
For these reasons WireGuard is the perfered VPN solution for Opuntia.
Generate a key pair
WireGuard requires a public and private key pair. And all connectinng devices will need to know the Public key for the WireGuard interface. And there must be a unique private key for each WireGuard interface. It’s possible to generate these keys on other systems and then use those keys on an Opuntia system. But currently there is no built in option to generate a new key pair from the Luci Web GUI. This functionality will be added in the future.
To generate a new WireGuard key pair you will to access the Bash CLI please see the Access via SSH chapter of the manual. Once you have an active CLI shell, you can run the following commands.
mkdir -p /etc/wireguard
cd /etc/wireguard
wg genkey | tee ./privatekey | wg pubkey > ./publickey
The first two commands create a /etc/wireguard driectory. Only the last line actually creates the public and private key. The resulting keys will be Base64 encoded. For the rest of this chapter we will be using the following example keys.
privatekey: 4NM0x6/2ndJktcHTfRXnWS3tzlo95QEgPBsen+swjFw=
publickey:  2wGMjbn6FU4+QKk7y1s37LuOfotw5moUR2LlFwXqJQ8=
Web GUI
To function, a WireGuard VPN requires a WireGuard Interface and Peer configuraion for each device connected to the VPN.
To begin creating a new WireGuard interface first navigate to the Network interfaces page.
Main Menu - Network –> Interfaces
Then click on the “Add new interface” button.
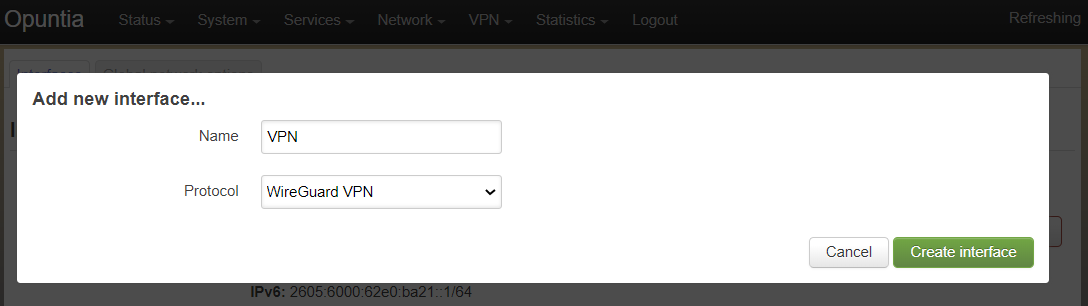
Name your new Interface and select protocol WireGuard VPN.
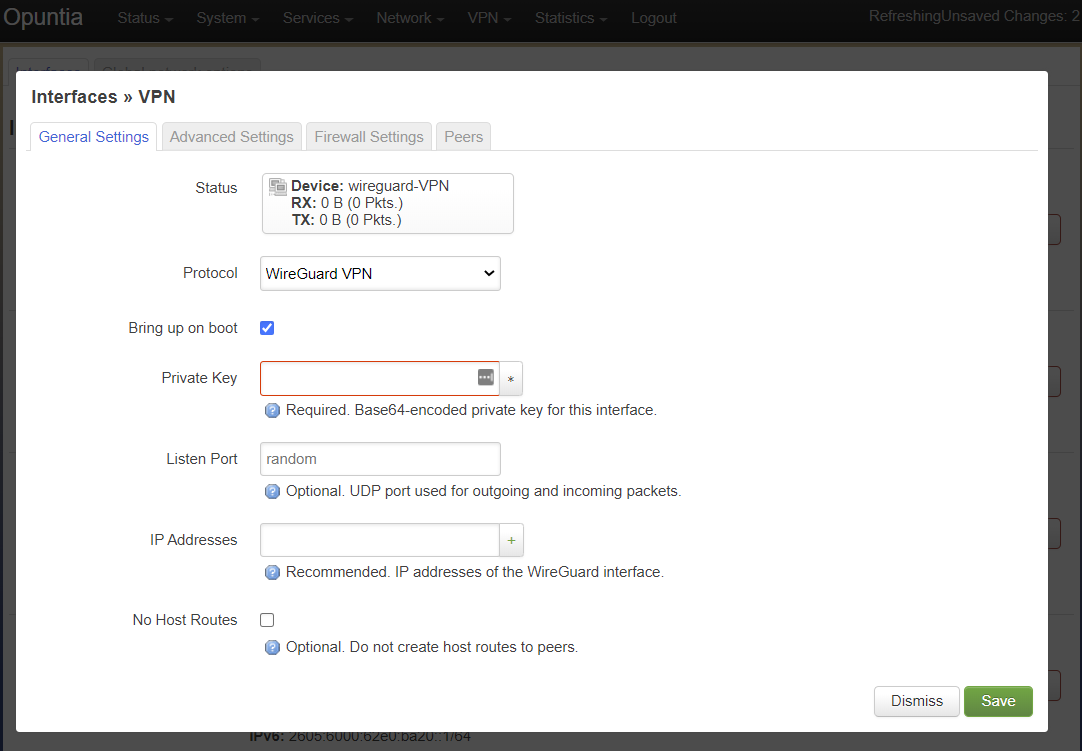
You will then see the WireGuard interface configuraion settings. Start the configuraion by adding the privatekey for this WireGuard interface. The privatekey will be only be used in the interface configuraion. To allow
Note
WireGuard will use a default listen port of 51820. If you have multiple WireGuard interfaces you will have to specify different udp ports for each interface.
While technically not required; we recommend that you set an Ip address on the WireGuard interface.
IPsec/L2TP
IPsec/L2TP is a widely deployed VPN technlogy since client support is built into most operating systems. It features the strong security of IPsec with the addition of the the L2TP tunneling protocol. This does add complexity to the already feature rich IPsec vpn. This allows for a username and password to be asigned each user. This is also sometimes considered a multi-factor VPN (Username/Password and PSK) which can fullfil configuraion requirements in some remote security enviorments.
Currently as of Opuntia version 4.8.17 this configuration has not recieved a Web GUI configuration menu. We will outline CLI method to configure this VPN type. To successfully configure IPsec/L2TP you will need the following items.
- Public IP Address
- Pre-Shared Key
- Username for each user
- Password for each user
Since the default options for IPsec/L2TP is to automatically negotiate most of the options for this type of VPN the total configuration is not that complex. There are four main files that need to be edited.
The first file that must be edited is /etc/ipsec.secrets.
# /etc/ipsec.secrets - strongSwan IPsec secrets file
203.0.113.1   %any : PSK "3dTamd01m"
This file configures your Public IP address and the Pre-Shared Key. In this example the 203.0.113.1 address is your public IP address that the clients will be connecting to. The “%any” allows any Ip Address to connect to this VPN. This can be used to limit connecting clients but is generally set to “%any” in most vpn configurations.
The Pre-Shared Key in this example is a short text string 3dTamd01m this string can be any valid ASCII string.
The second file is the main IPsec configuraion file /etc/ipsec.conf
/etc/ipsec.conf¶# ipsec.conf - strongSwan IPsec configuration file # basic configuration config setup # strictcrlpolicy=yes # uniqueids = no # Add connections here. conn vpnserver type=transport authby=secret rekey=no keyingtries=1 left=203.0.113.1 leftprotoport=udp/l2tp right=%any rightprotoport=udp/%any auto=add
Here you see the IPsec Pre-Shared Key configuraion named vpnserver. This defines the IPsec parmeters for the connection. Notable options specified are authby=secret, left=203.0.113.1, right=%any and both of the right and left protocol ports.
The authby setting tells the IPsec subsystem to use the Pre-Shared Key that we set in the /etc/ipsec.secrets file. The left setting defines the Public IP Address that the system is using and this right allows any client to connect. The two protocolport options specify that only UDP port 1701 will be encrypted using IPsec.
This ends the IPsec configuraion that needs to be configured.
The next two files deal with the L2TP configuraion. First up is the /etc/xl2tpd/xl2tpd.conf configuraion file.
/etc/xl2tpd/xl2tpd.conf¶[global] port = 1701 auth file = /etc/xl2tpd/xl2tp-secrets listen-addr = 203.0.113.1 access control = no debug tunnel = no [lns default] exclusive = yes local ip = 192.168.88.1 ip range = 192.168.88.10-192.168.88.200 hidden bit = no length bit = yes require chap = yes refuse pap = yes name = vpn ppp debug = yes pppoptfile = /etc/ppp/options.xl2tpd
This is the L2TP server configuraion file. Here you see the Public IP Address referenced in the global listen-addr setting. The default lns (L2TP server) specifies the local IP Address that will be assigned to the router and to the client devices.
In this example; we have chosen to set the router’s IP Address to 192.168.88.1 and we allow clients to use a range of 192.168.88.10 through 192.168.88.200. If you are accessing other internal networks; you may need to add a route to this network from other devices.
One other setting of note is the ppp debug = yes option. This will cause verbose system logs to be generated when clients connect to the vpn service.
The final configuration file defines the users and passwords that the clients need to provide to access the VPN.
/etc/ppp/chap-secrets¶# Secrets for authentication using CHAP # client server secret IP addresses alice vpn 47roses * bob vpn D3adB33f *
This file is the standard chap-secrets format. Here we have two users setup; alice and bob. We see the server setting is vnp which is the name of the default lns set in our example xl2tpd.conf file from above. We also see the two passwords that these users have chosen. This “*” setting allows the client to get any IP address from the pool that we have defined.
Firewall configuraion
By default Opuntia needs to be configured to allow incoming L2TP connections in the wan firewall zone. If see the firewall chapter for more general information.
The rule we need to add is an accept rule for the Wan input zone that allows TCP and UDP port 1701 traffic.
To navigate to the Firewall configuraion page.
Main Menu - Network –> Firewall –> Traffic Rules
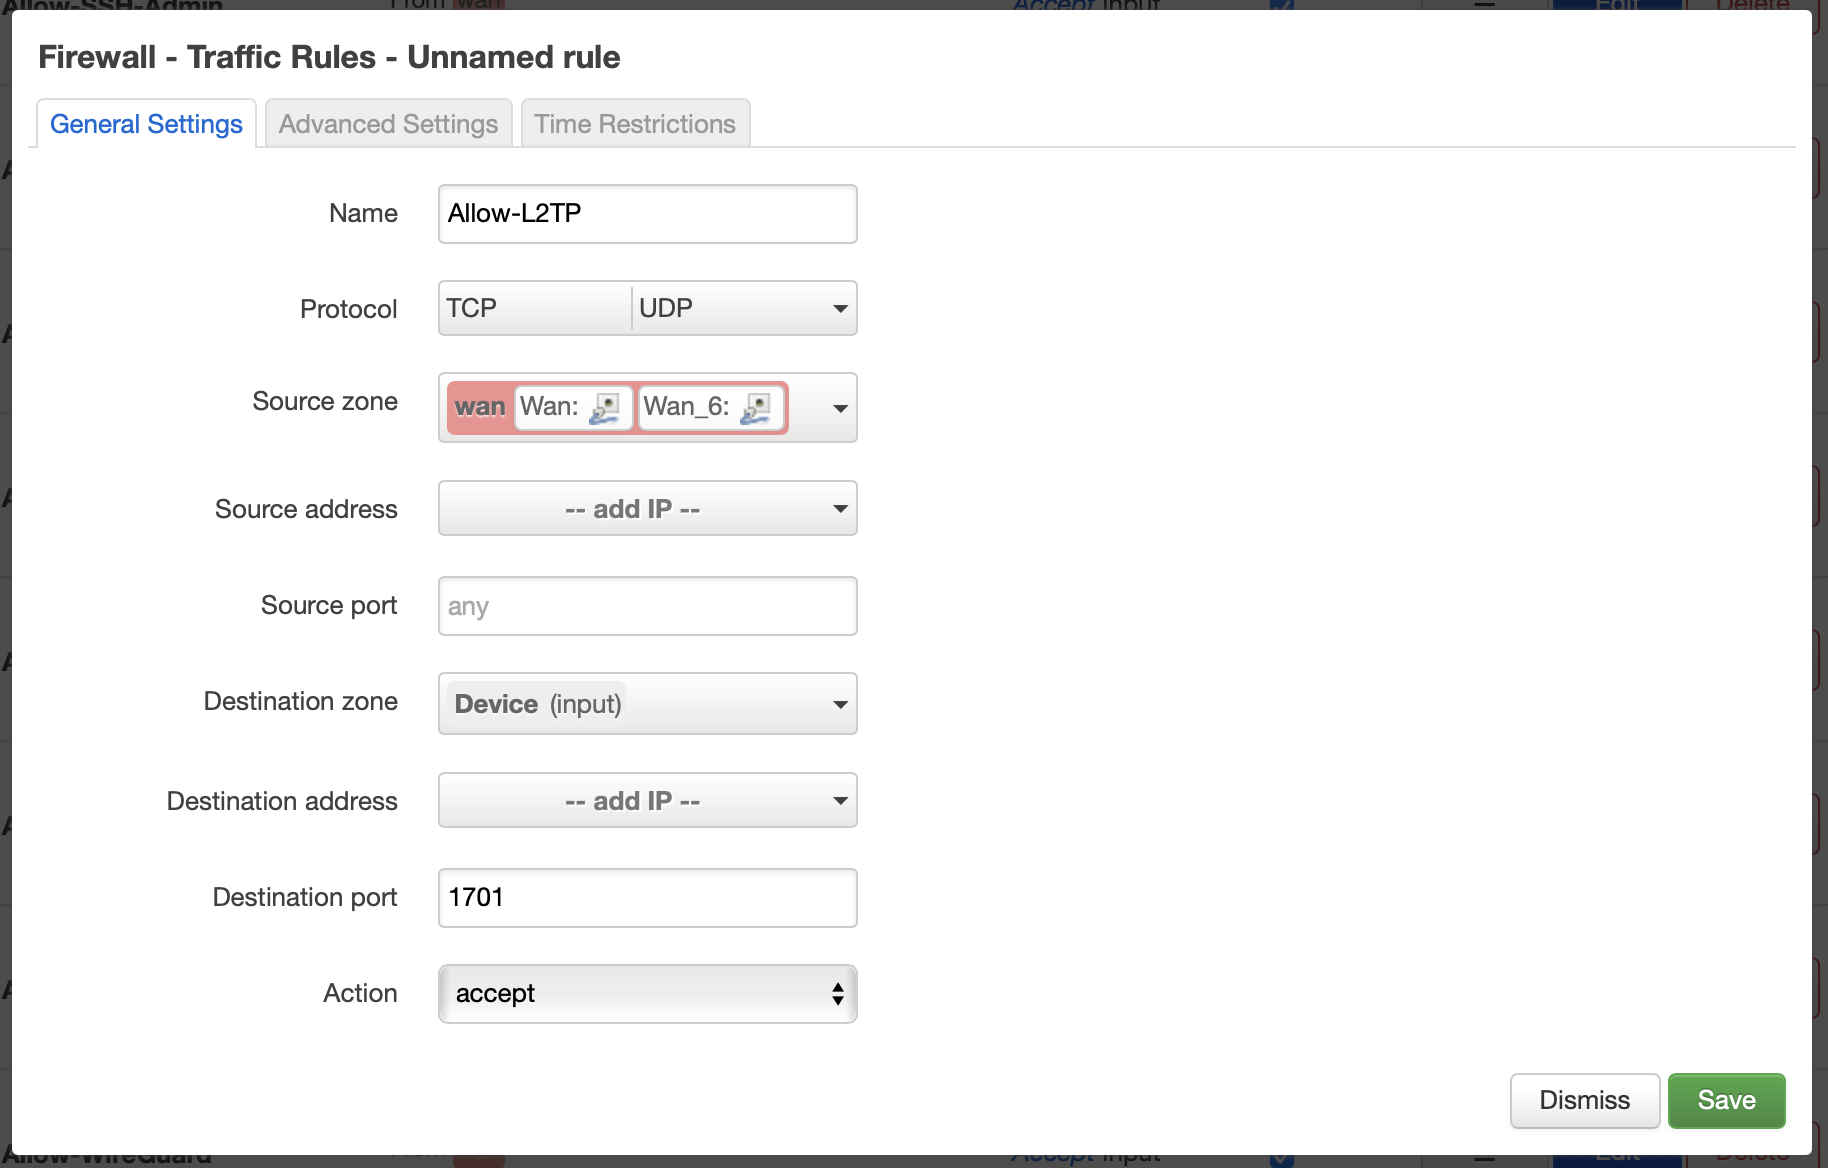
Once that rule is installed you will see this from the firewall ruleset summary.

Client Setup
Windows 10
Windows 10 supports IPsec/L2TP clients natively. In this section we will detail the configuraion process when setting up a Windows 10 client to connect to our example IPsec/L2TP vpn from above.
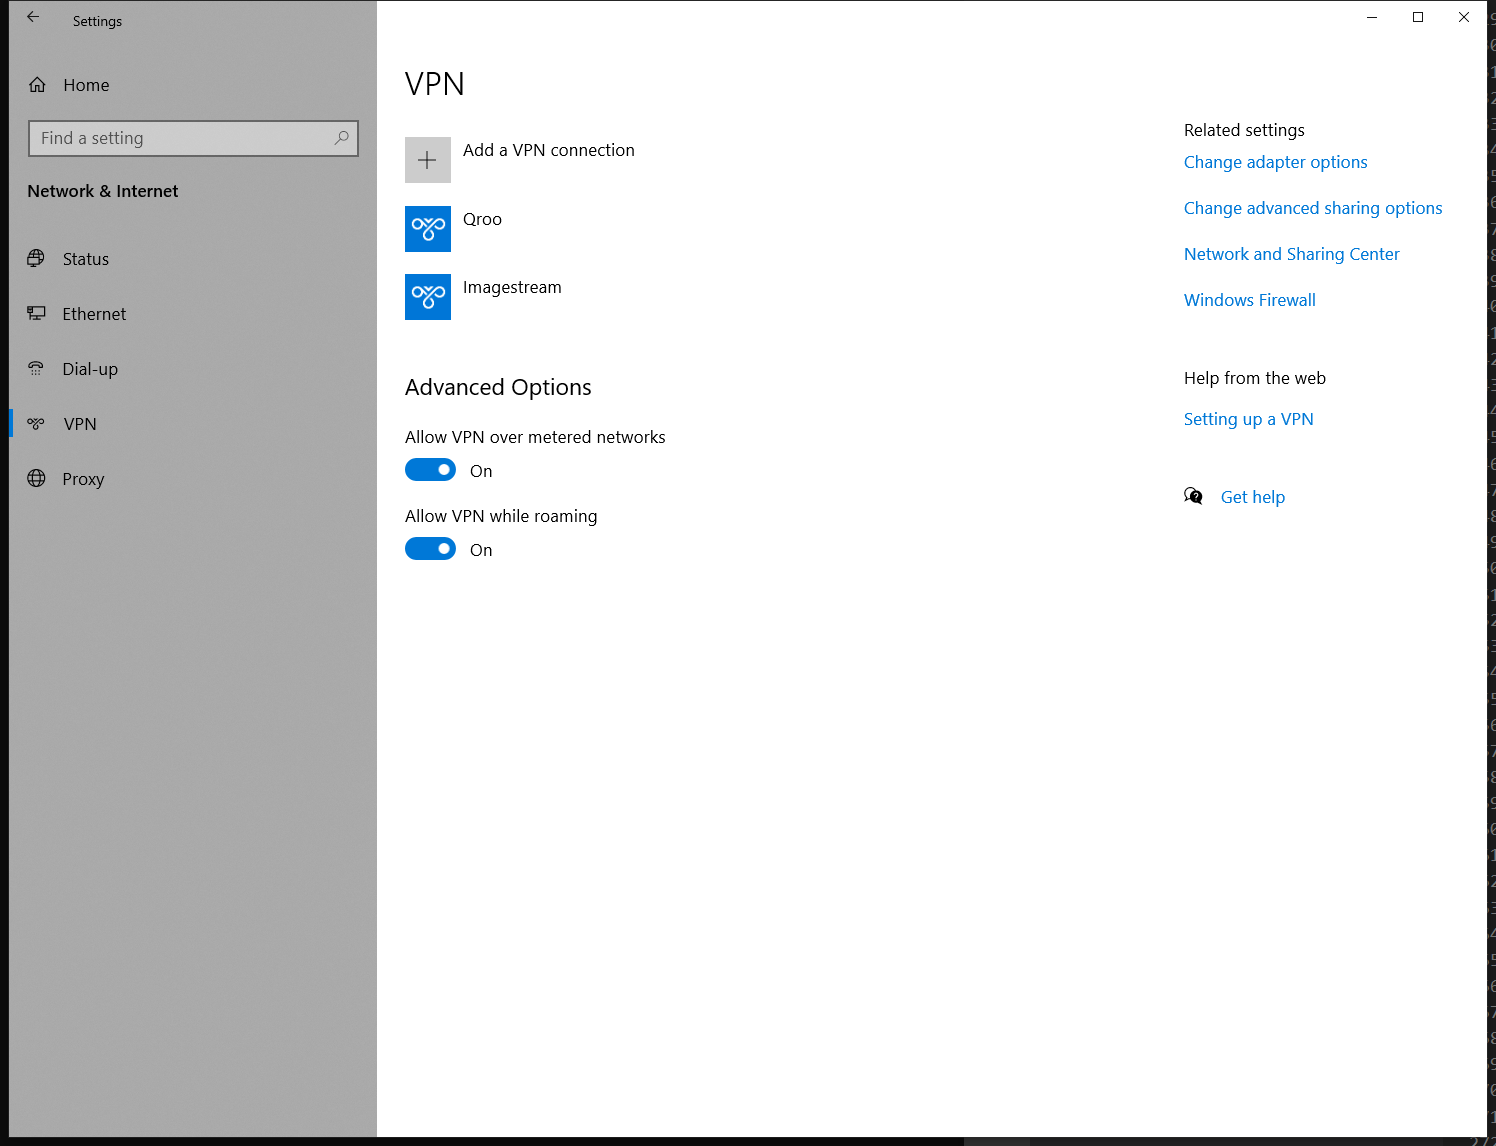
The first step is to open the Network & Internet settings in the Windows 10 control panel. And then click the VPN setting in the left panel.
Then click the Add a VPN connection button.
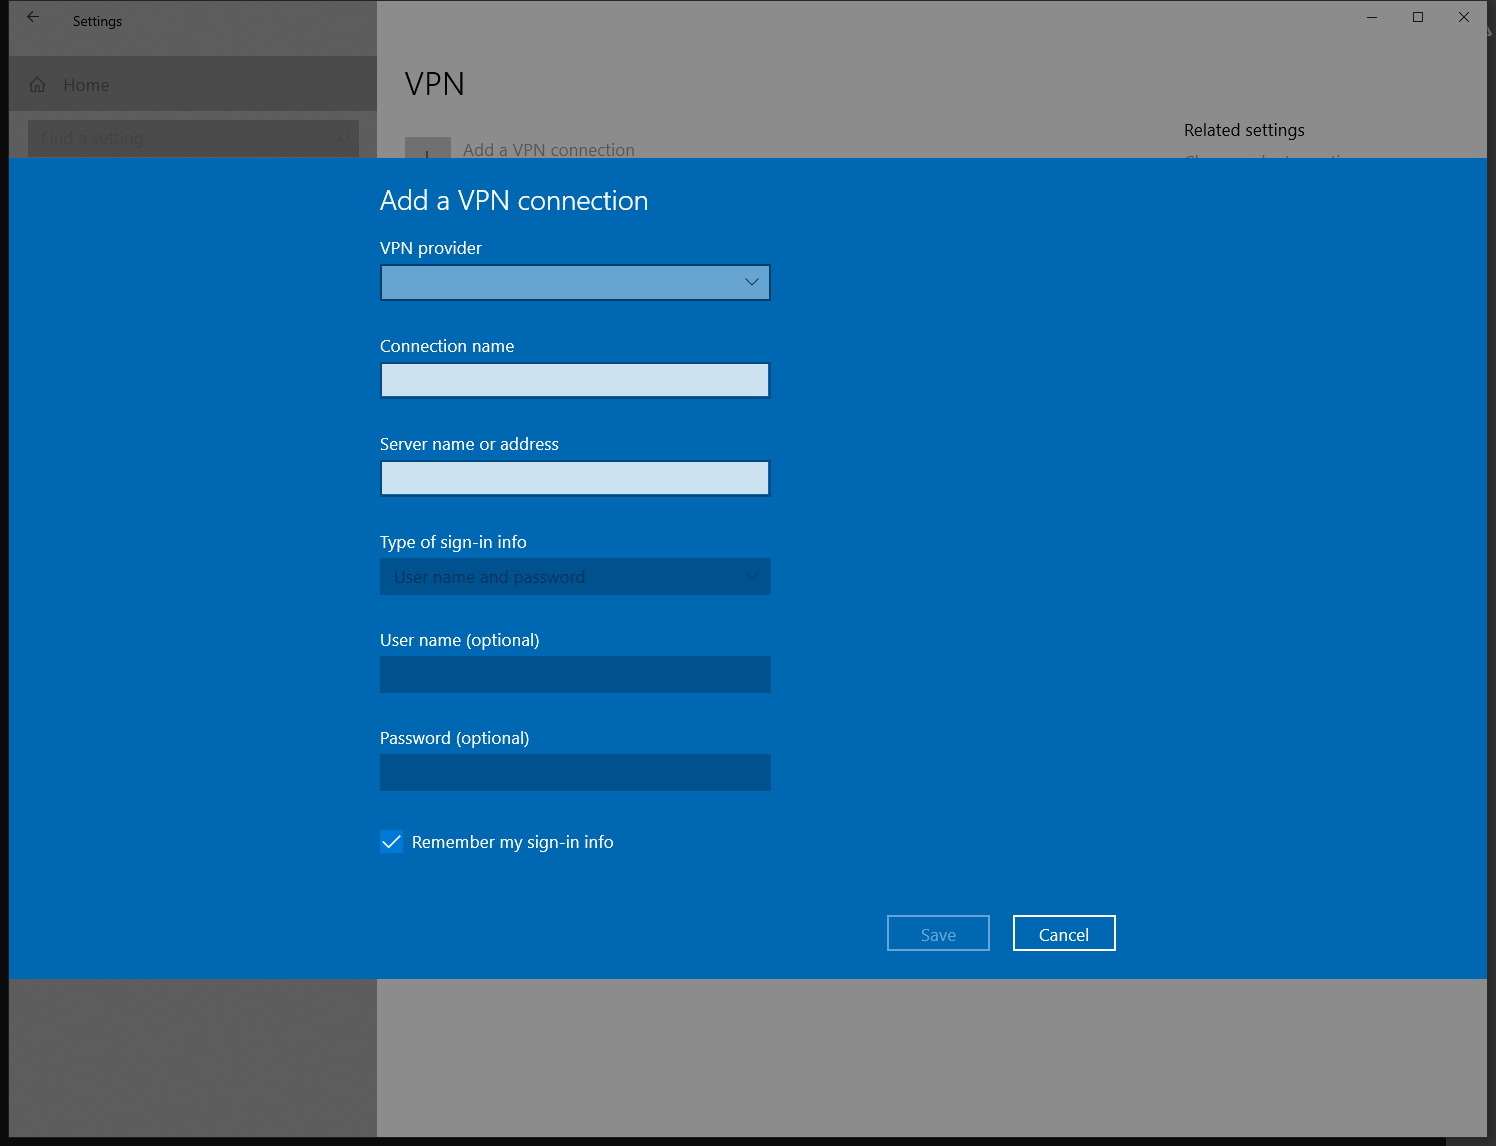
This will bring up the VPN connection configuraion page.
Set the VPN provider to “Windows (built-in)”. Connection name can be any name we wish, in our example we will set it to “Office-VPN”.
Since our example VPN server is at ip address 203.0.113.1 we will configure that in the Server Name or address box. This could be a DNS hostname in other configurations.
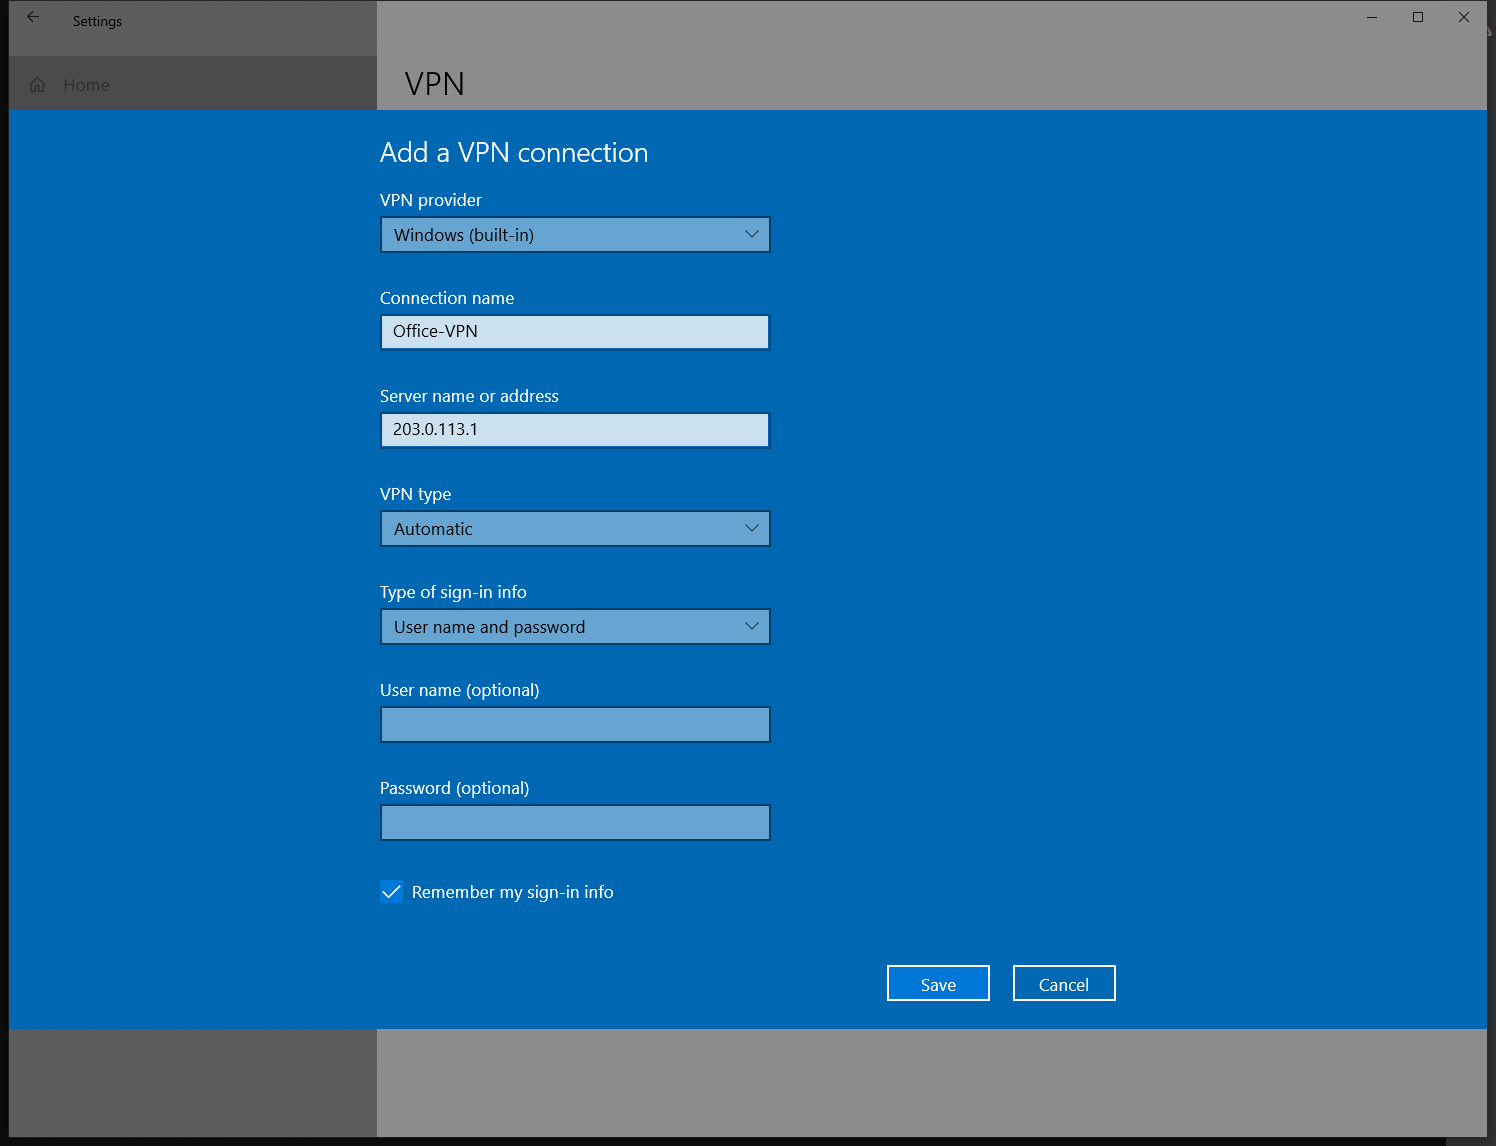
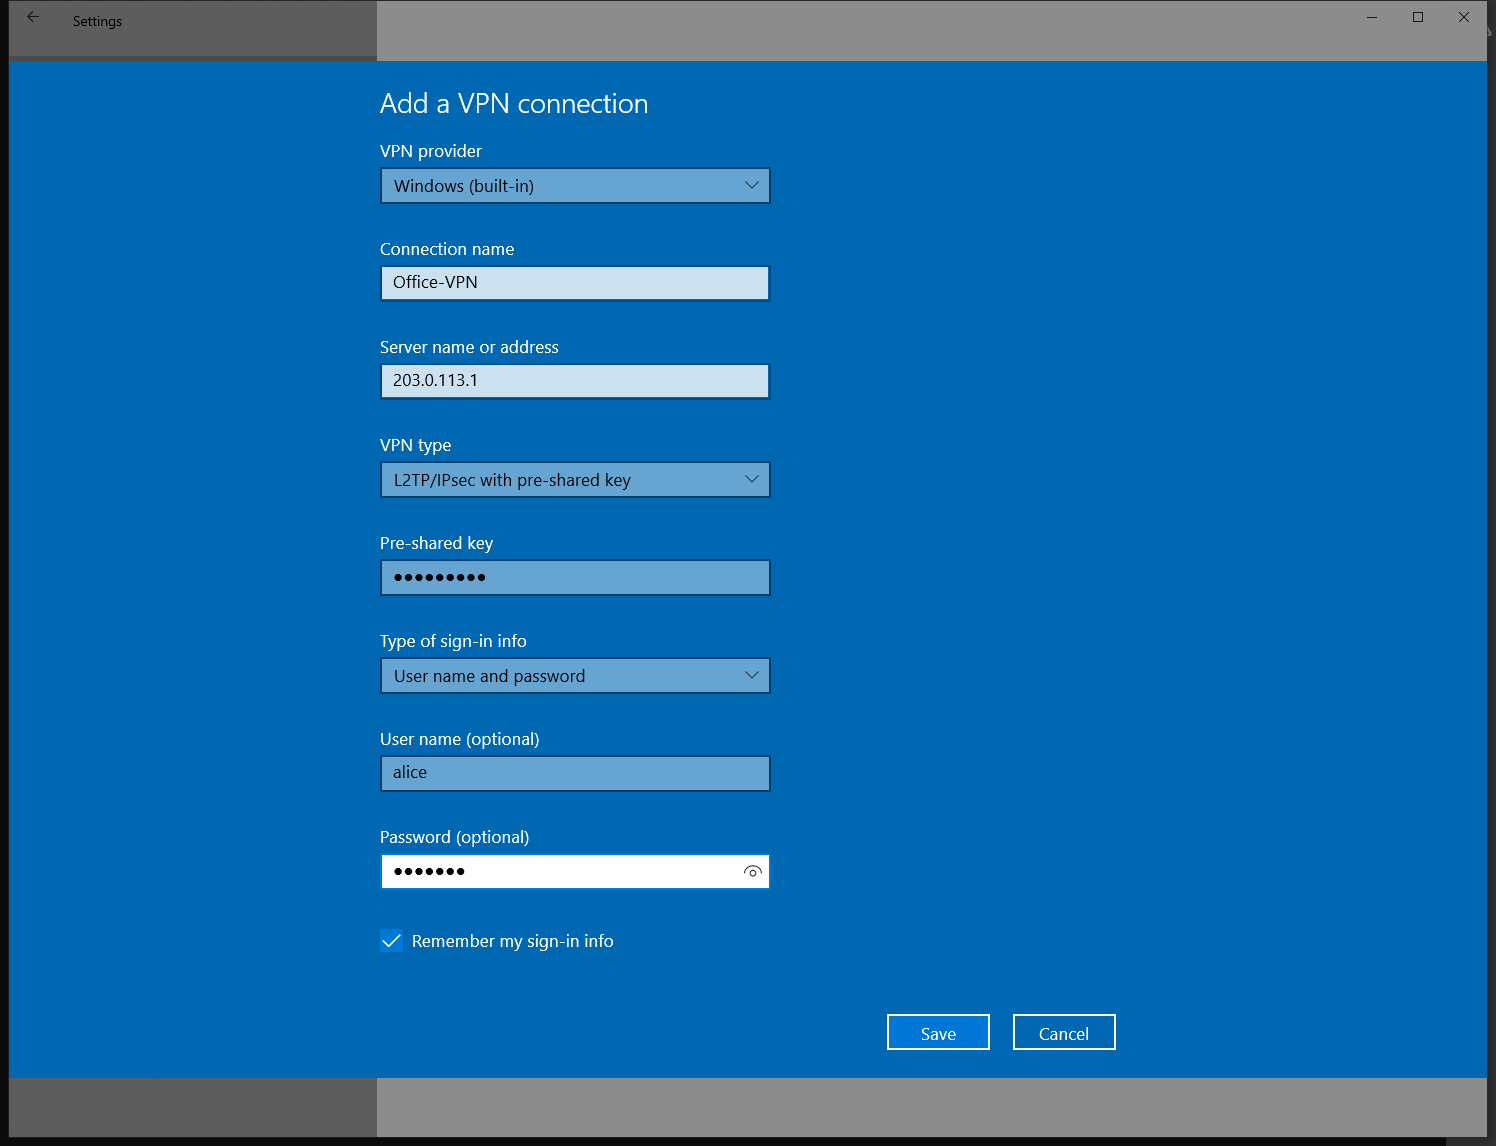
Now we need to change the VPN type to “L2TP/IPsec with pre-shared key”. This matches the configuraion of the Opuntia system that we configured in the section above. Doing this will add the “Pre-Shared key” option. Enter your configured PSK; in this example it’s 3dTamd01m.
The type of sign-in info is “User name and password”. Next enter your chosen username/password information. Following our example; username alice password 47roses.
To save the vpn configuration click the “Save” button.
After saving the configuraion you will be returned to the Network & Internet settings in the Windows 10 control panel.
You can then click the Office-VPN button a small drop down box will then expand.
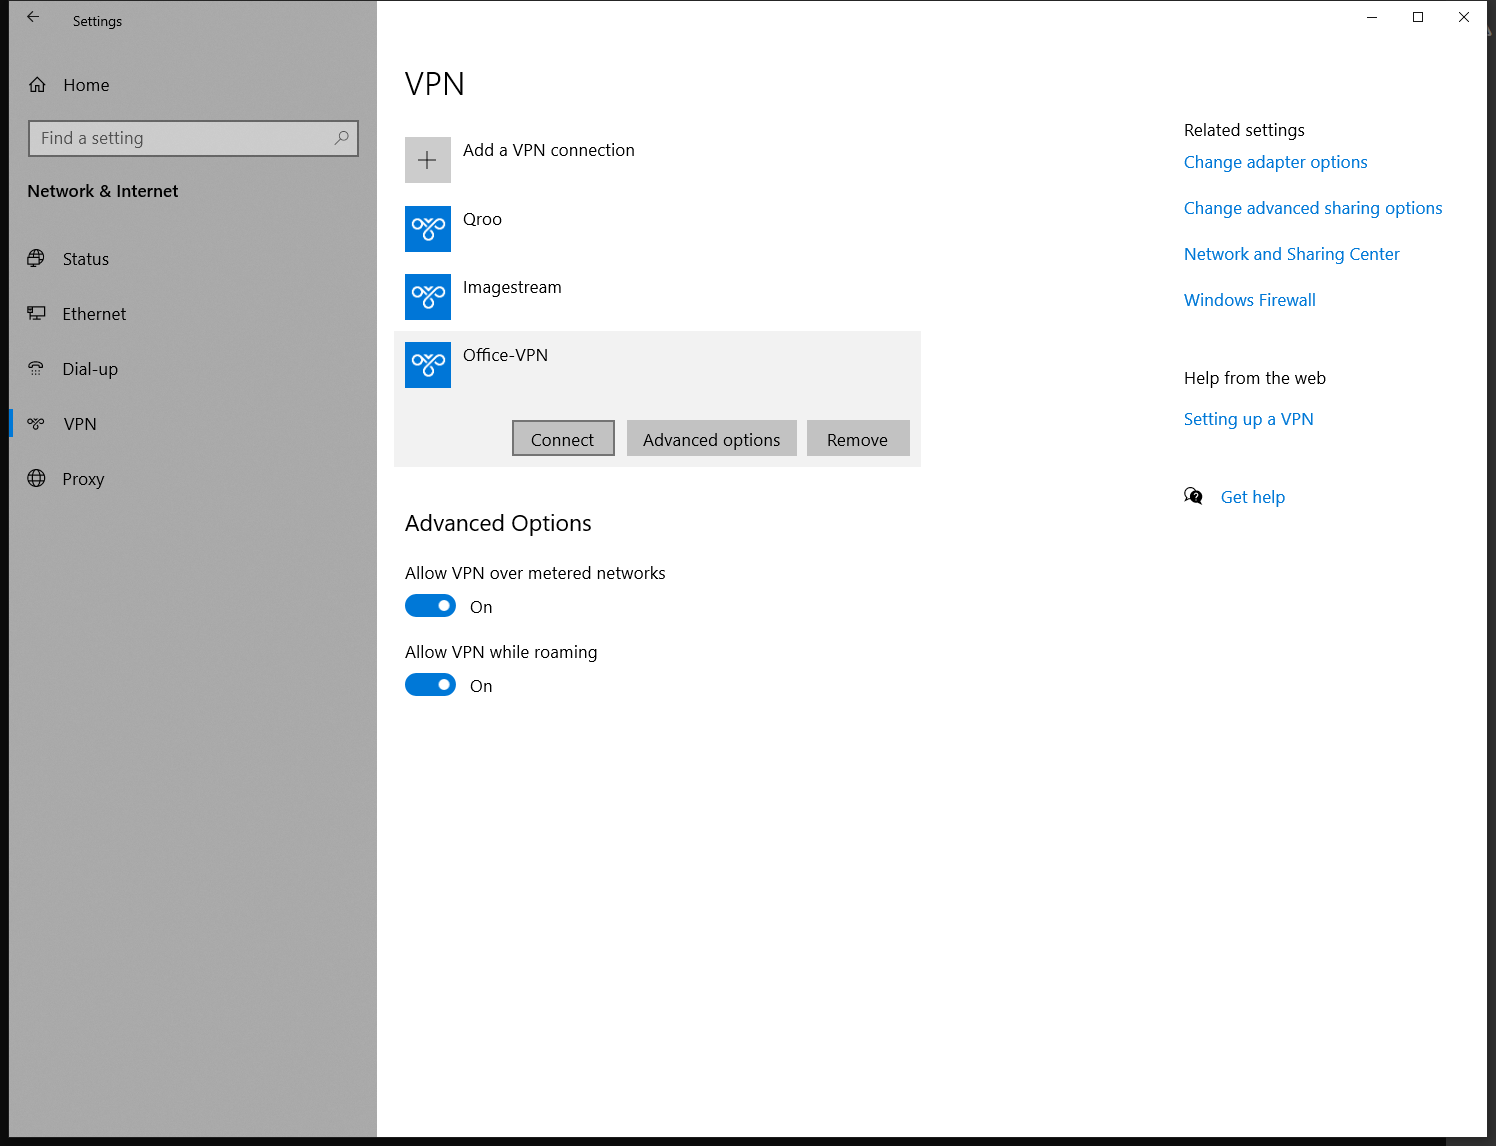
Finally to connect to the VPN just click the connect button.
By default Windows 10 will route all traffic through the IPsec/L2TP Vpn.
MacOS Big Sur
MacOS supports IPsec/L2TP clients natively. In this section we will detail the configuraion process when setting up a MacOS client to connect to our example IPsec/L2TP vpn from above.
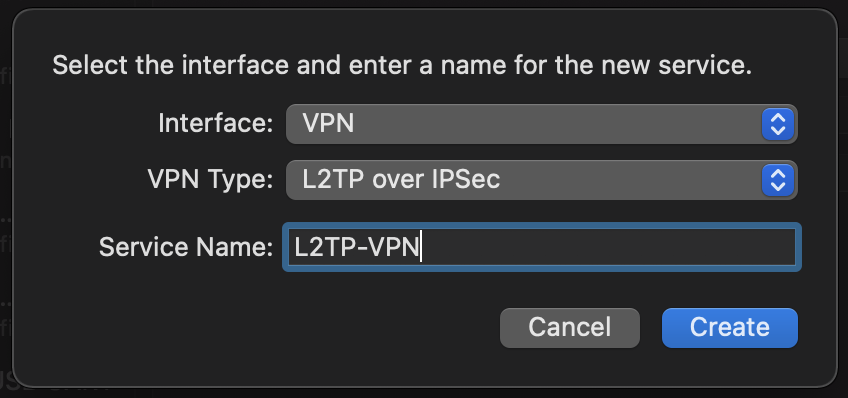
The first step is to add a new interface in the System Preferences–>*Network*. You can create a new Interface by clicking the + in the bottom left side of the interface menu. Set the “Interface Type” to VPN and the “VPN Type” to L2TP over IPsec. The “Service Name” can be set to your perfered name for the VPN. In our example we will set it to L2TP-VPN.
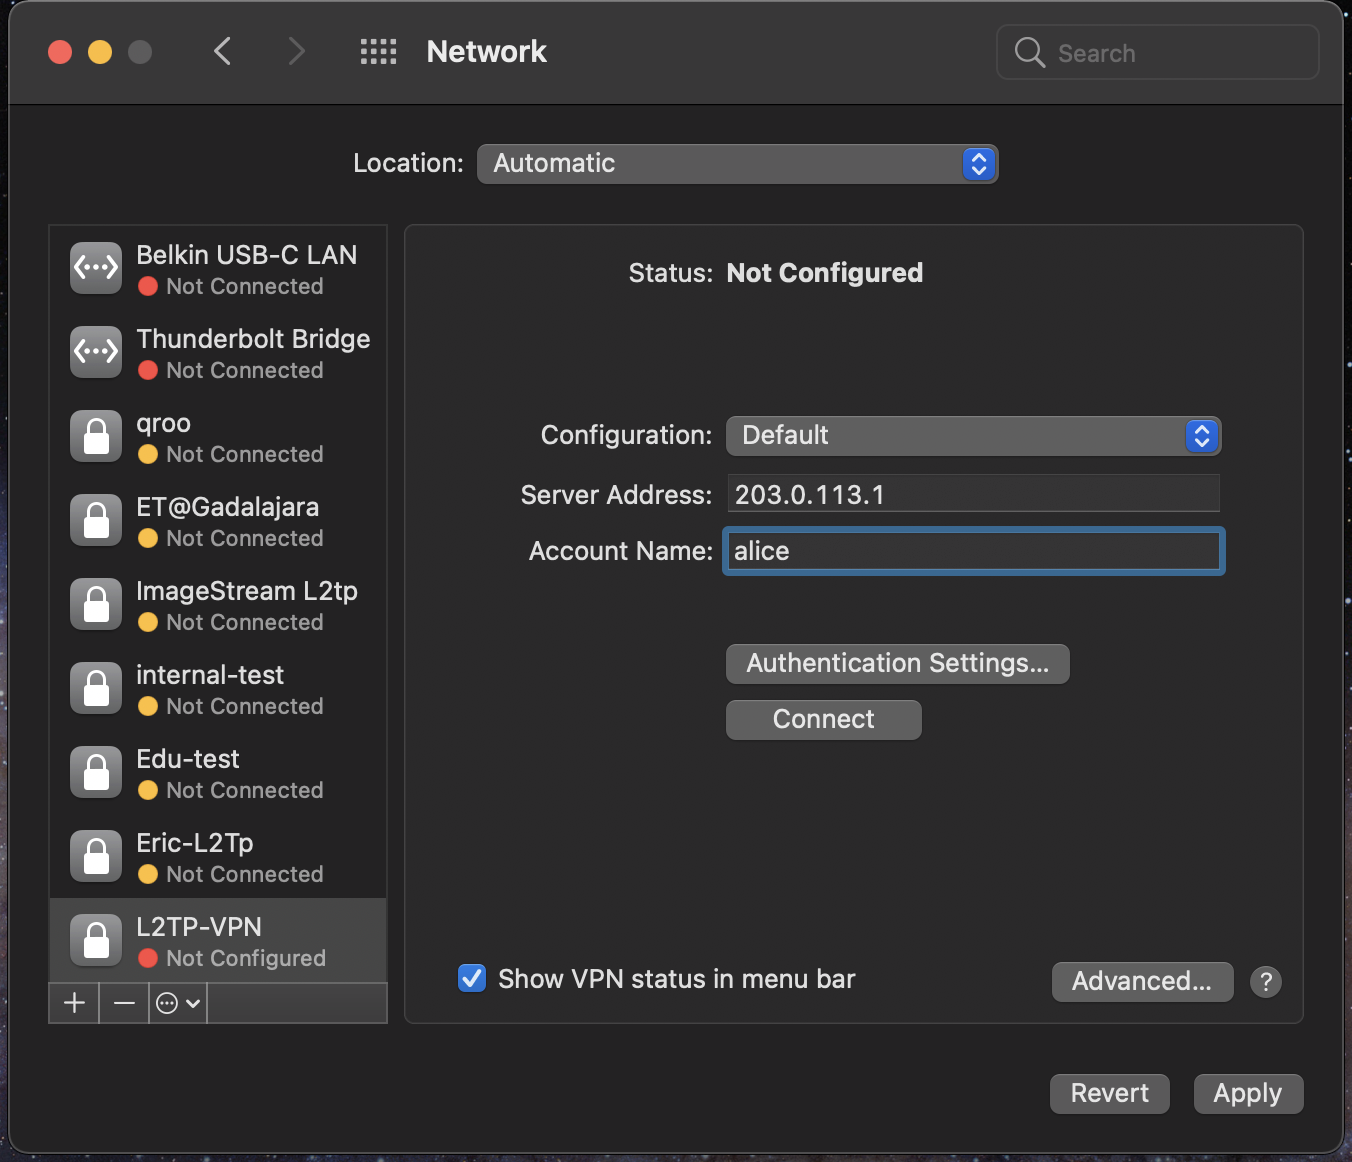
The next step is to configure the basic “Server Address” and “Account Name” for the VPN. The “Server Address” will be the public IPv4 address that we set above; or in this example 203.0.113.1. The “Account Name” will be alice.
The next two configuraion items can be set by pressing the “Authentication Settings…” button.
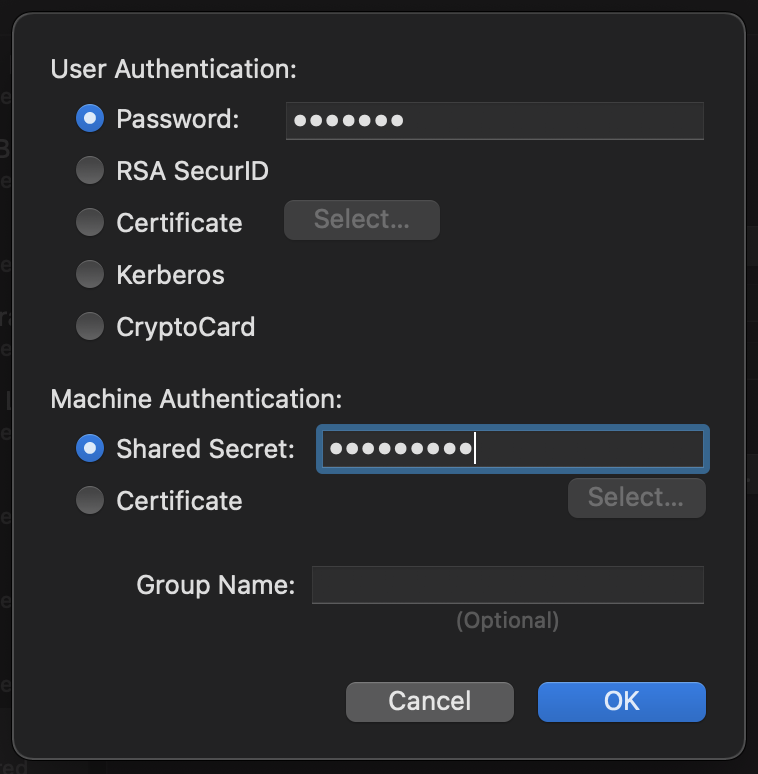
In the “Authentication Settings” dialog box, you will need to set the password for the user. In this example the password for alice is 47roses and is entered into the “Password” field in the “User Authentication” section.
Next; set the Pre-Shared Key in the “Shared Secret” field in the “Machine Authentication” section. In our example this would be 3dTamd01m. This concludes the minimum configuraion settings for a IPsec/L2TP VPN.
MacOS Big Sur Optional Settings
MacOS IPsec/L2TP has two common configuraion options descibed below.
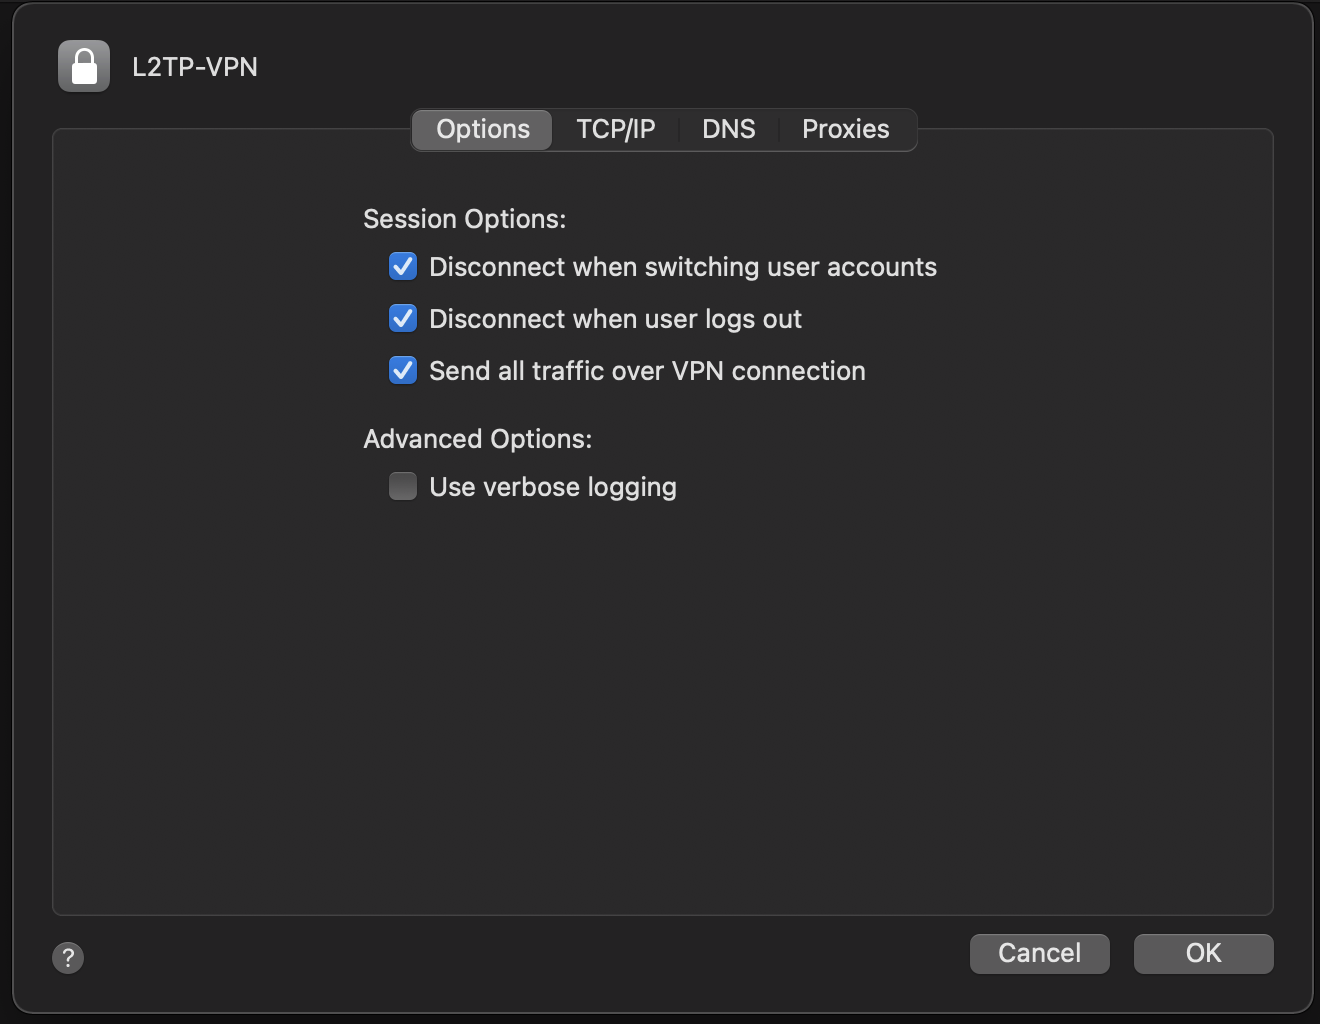
By default MacOS does not route all traffic through the IPsec/L2TP Vpn. This is a common requested configuraion. Access the advanced vpn configuration option. Then under the Options tab select “Send all traffic over VPN connection”.
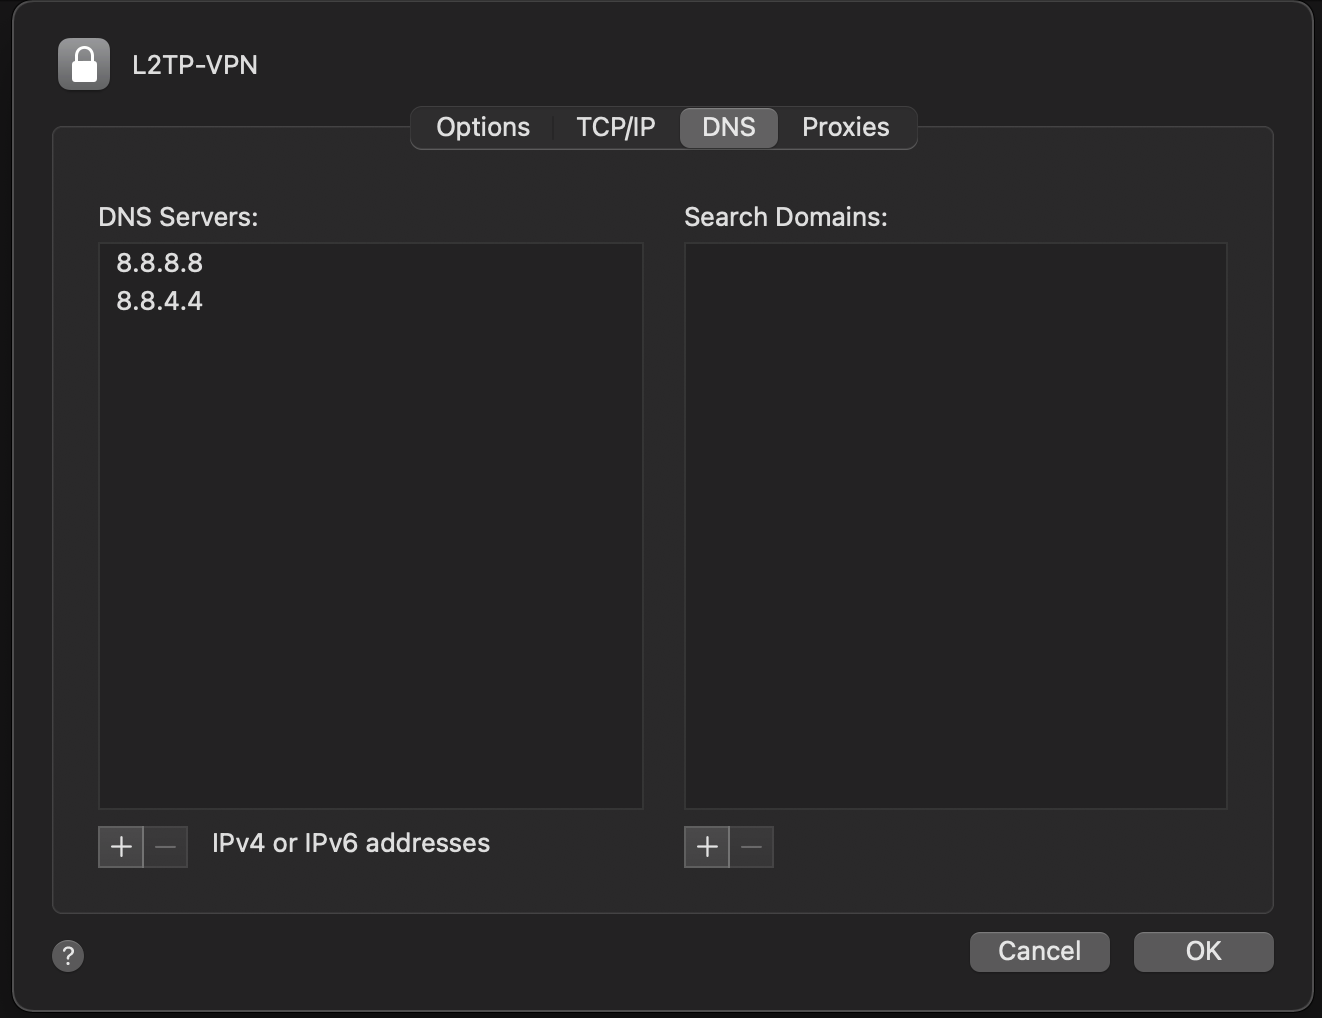
When routing all traffic over the VPN it is also necessary to define your DNS servers. Access the advanced vpn configuration option. Then under the DNS tab add a new DNS server by clicking the “+” button on the bottom left side of the dialog box. In this example we set the Google IPv4 public DNS servers.